
Livraison le jour même ou le lendemain

Qualité garantie

Débloquez vos offres de bienvenue: Livraison GRATUITE | Jusqu'à -80 % | 30 jours d'essai gratuits à JoyPlus
Téléchargez l'application
Finding the right tool for a creative project can quickly become a headache. Do you dream of an acrylic paint marker with opaque, brilliant colours, even on dark surfaces? Are you tired of markers that need endless shaking or those whose colours bleed and blend at the first stroke?
Whether you're a fan of adult colouring, a passionate crafter (DIY), or an artist at heart, the choice of marker is crucial. This guide breaks down the Sharpie acrylic marker for you, an ally designed to meet these expectations. Our mission: to help you find the perfect model for your creations, without the unnecessary jargon.
Before diving into our selection, let's review the essential criteria to ensure your next paint pen is the perfect partner for your creations.
The shape of the tip determines the type of line you can create.
A good acrylic marker should never limit your creativity. Its strength? Adhesion to a multitude of surfaces. Make sure the model you choose is a multi-surface marker. Markers with water-based acrylic ink, like those in the Sharpie range, are designed to work on a wide variety of materials: wood, metal, stone, canvas, paper, and even glass or ceramic (glass marker, ceramic marker). This versatility opens up a nearly infinite field of possibilities.
For a professional finish, ink opacity is a non-negotiable criterion, especially on coloured or dark surfaces. A high-coverage ink guarantees an intense, vibrant colour. Equally important, the ability to layer colours without them bleeding is a major asset. This allows you to create depth, add details over an already dry colour, or even correct small mistakes.
Let's get down to business: here are the models from the Sharpie Acrylic range that have caught our attention.
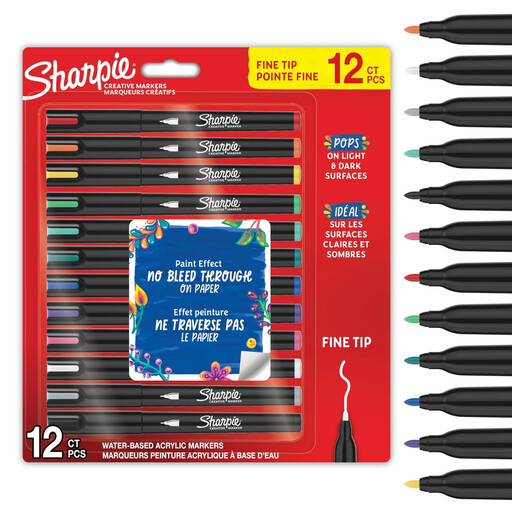
Why it stands out: Its fine tip makes it the tool of choice for high-precision work. It is particularly popular for detailed drawing and the complex areas of colouring books.
Highlights:
Who is it for? Hobby artists and colouring enthusiasts who prioritise precision above all. Perfect for mandalas, mystery colouring, and customising small objects.
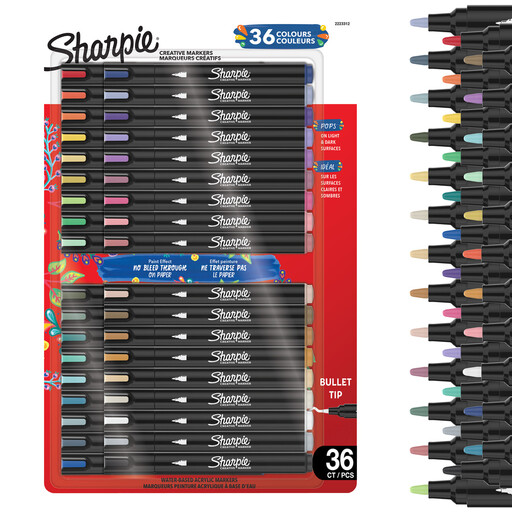
Why it stands out: This generous 36-colour set in warm tones, combined with a chisel tip, is designed for large-scale projects and bold colour blocking.
Highlights:
Who is it for? Creatives who work on large surfaces, lettering fans, and anyone looking to build a broad colour palette for their illustrations or decor projects.
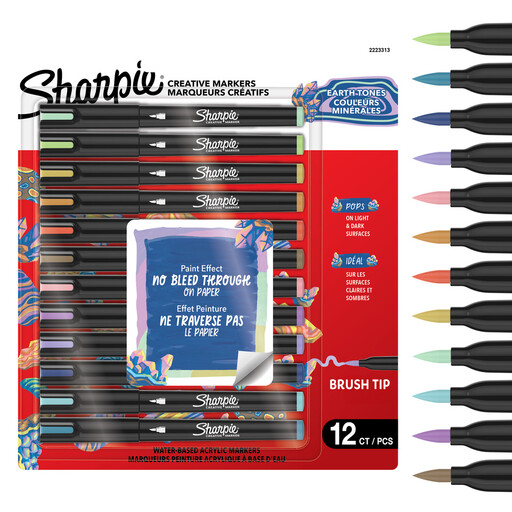
Why it stands out: The flexibility of its brush tip offers an experience similar to painting, but with the convenience of a marker. It allows for great expressiveness in your strokes.
Highlights:
Who is it for? Illustrators, fans of hand lettering, and artists who enjoy varying effects and are looking for a more organic, painterly finish.
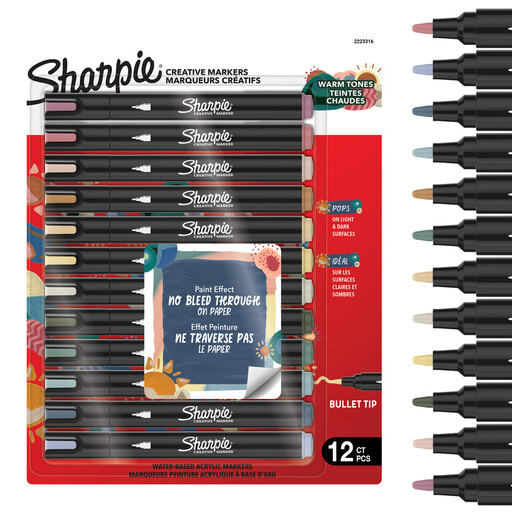
Why it stands out: The bullet tip is an excellent happy medium, offering clean and consistent lines. It's a reliable tool for colouring and general drawing.
Highlights:
Who is it for? A very versatile choice, suitable for beginners and experienced artists alike. Perfect for adult colouring, drawing, and creative projects that don't require extreme detail or wide coverage.
If these models don't quite match your project or if you're simply curious, feel free to explore our full range of markers and colour palettes.
Discover our entire collection of colouring and sketching markers
1. Do Sharpie acrylic markers work on glass and ceramic? Yes, these multi-surface markers adhere very well to glass and ceramic for decorative use. For optimal hold on these smooth surfaces, be sure to clean and degrease the surface before application. For increased resistance (to washing, for example), you can bake your creations in an oven once the ink is dry, following tutorials dedicated to this technique. Please note: these markers are not designed for food contact.
2. Do you need to shake these markers before use? No, and that's one of their major advantages! Unlike many other paint markers, the Sharpie Acrylic range is ready to use. To maintain their performance, we simply recommend storing them horizontally.
3. How can I layer colours without them bleeding? The secret is patience! The water-based acrylic ink dries quite quickly. To layer colours without them merging, simply wait for the first layer to be completely dry to the touch. This will give you sharp outlines and flawless fills.