
Livraison le jour même ou le lendemain

Qualité garantie

Débloquez vos offres de bienvenue: Livraison GRATUITE | Jusqu'à -80 % | 30 jours d'essai gratuits à JoyPlus
Téléchargez l'application
Metal cutting dies for scrapbooking let you create perfectly regular shapes in paper, thin cardstock and certain soft materials compatible with a die-cutting machine. They can also double as embossing stencils to add texture and dimension to cards, photo albums and DIY decorations.
Not all dies are created equal, though. A design that’s too delicate can be tricky to remove from the paper; an awkwardly sized die might limit your projects; and a poorly described set could contain fewer pieces than you expect. Here’s what to check before you buy your next scrapbooking accessory.
A die designed for paper cutting typically has a sharp outline or edges that separate the material. An embossing stencil, on the other hand, is used to create a raised or textured pattern. Some models do both jobs, but that versatility depends on your machine, the plates you use and the thickness of your paper.
Before you place an order, check whether the product is described as a die, a stencil or a two-in-one tool.
A photo can make a die look large when it’s actually intended for small cards. For card-making, a flower, butterfly or leaf motif needs to be in proportion to the card base. In an album, borders and frames may need to be longer.
If the dimensions aren’t clearly stated, that should set alarm bells ringing. When this information is missing, it’s safer to plan for small-format use rather than a full page.
A set might contain several very similar dies, or it could offer complementary elements. Highly detailed designs give a delicate finish, but they often need the right paper and careful removal. For beginners, dies with broader outlines are generally much easier to handle.
Carbon steel cutting dies are valued for their thin profile and stiffness. However, the stated material doesn’t guarantee universal compatibility – the pressure needed varies depending on your machine and the plates you use.
To avoid nasty surprises, consult your machine’s manual and check the following:
Motifs such as flowers, butterflies, leaves and frames suit a wide range of DIY card-making projects. Simple outlines work well for greeting cards, while more detailed compositions can decorate an album cover or frame a photo.
A die with lots of small openings is likely to trap more paper fragments. A removal tool, a needle or a protective sheet can make extraction much easier.
Cardstock, scrapbooking paper and lightweight cardboard all behave differently. For your first attempts, use a medium-weight paper and test it on a scrap piece first. You can then adjust the pressure, the number of passes or the plate position following your machine manufacturer’s recommendations.
To round out your toolkit, you can also browse the selection dedicated to embossing and debossing equipment.
The products below meet different needs. The information provided covers the design theme, the number of pieces stated and the intended use for cards, albums or paper projects.
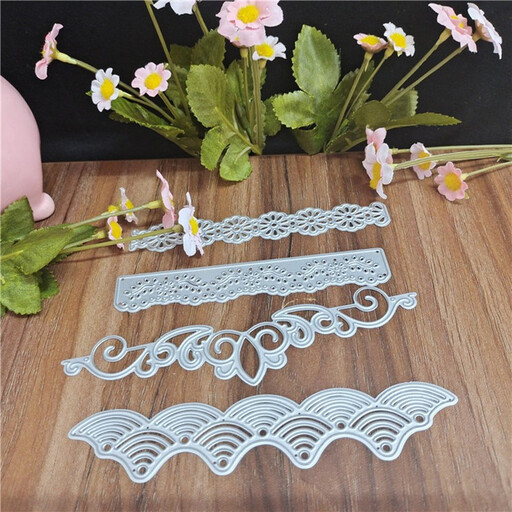
Why this choice suits this profile: This four-piece set lets you get started with several shapes without buying multiple items. It’s ideal for your first cards, cutting tests and small paper projects.
The number of pieces is clearly stated and the material is listed as carbon steel. This makes it easy to compare with sets where the contents are vague.
Set of 4 dies, carbon steel stated, intended use for paper and card making.
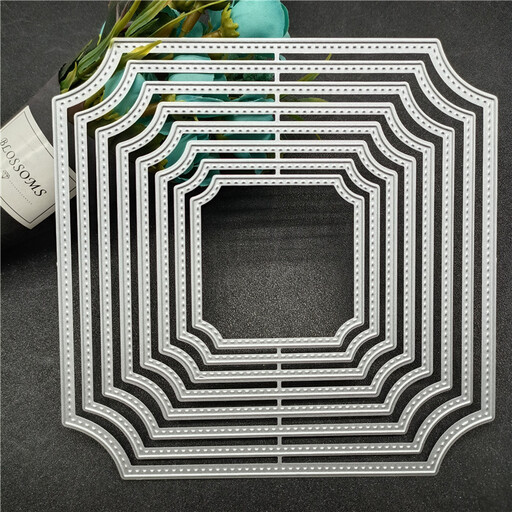
Why this choice suits this profile: Crafters looking for a structured finish can vary their framing on wedding cards, album pages or layered compositions.
The set states 8 dies and focuses on frames. This makes it easier to check whether the contents match your style before ordering.
8 pieces stated, irregular frame shapes, use mentioned for cards, albums and embossing.
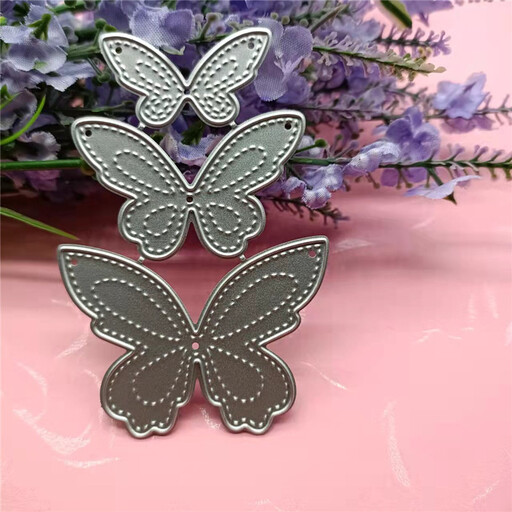
Why this choice suits this profile: This themed die set is aimed at card-makers who regularly use butterflies as a central element, especially for invitations, albums and layered decorations.
The listing clearly distinguishes three butterflies. This level of detail lets you anticipate the variety available and avoids a purchase based solely on a promotional image.
Butterfly theme clearly identified, use indicated for scrapbooking, cards and album decoration.
After each session, remove any small fragments stuck in the openings before storing your dies. A flat box, a compartmentalised pouch or a folder with dividers will prevent scratches and make it easy to find the design you need.
Never force a die into the machine if the plate won’t close properly. Excessive pressure could warp the material or damage the tool. With detailed designs, make sure the paper is lying flat and adjust the settings gradually.
It’s also a good idea to note the dimensions and theme of each die in your storage system. That way, you’ll avoid buying similar designs more than once and can build a cohesive collection of flowers, leaves, butterflies, borders and frames.
We’ve put together a comprehensive, real-time updated list of products that fully meet these strict selection criteria and European safety regulations.
Most metal dies are designed for a manual die-cutting machine that works with pressure plates. The sizes and thicknesses accepted vary between models. Always check your machine’s manual before using a new die.
A medium-weight cardstock is a good starting point. Very thin papers can wrinkle, while card that’s too thick may need more pressure than your machine can provide. Test on a scrap piece before cutting your final project.
Its lifespan depends on how often you use it, the paper you choose, the pressure applied and how you store it. Regular cleaning, appropriate pressure and keeping it away from damp conditions will help preserve the die’s shape.