
Livraison le jour même ou le lendemain

Qualité garantie

Débloquez vos offres de bienvenue: Livraison GRATUITE | Jusqu'à -80 % | 30 jours d'essai gratuits à JoyPlus
Téléchargez l'application
Gel nail stickers are winning people over with their quick application, glossy finish and, for some options, no need for a UV lamp. They let you create a stick-on French manicure or easy nail art at home, without waiting for regular polish to dry. But not all marketing promises are created equal.
Before you buy gel nail stickers, three pitfalls deserve your attention: a poor size fit, adhesion that doesn’t stand up to daily life, and a composition that’s too vague. To make the right choice, focus on fit, material and application instructions.
A sticker that covers the skin or cuticles is likely to peel off quickly. On the other hand, one that’s too narrow leaves part of the nail exposed and can give an uneven result. Kits containing 20 pieces in different sizes generally offer more room for adjustment than a uniform set.
For stickers intended for natural nails, choose a strip slightly smaller than the nail rather than one that overhangs the sides. How long it lasts also depends heavily on how well you prepare the surface.
The term “gel” often describes the texture or decorative layer of the product. It doesn’t mean the manicure will withstand everything. Frequent hand washing, washing up, swimming, heat and household cleaners can all reduce how long it stays put.
Product descriptions sometimes claim a wear time of up to 14 days under certain conditions. This is an indication, not a guarantee that works for everyone. Applying to clean, dry, grease-free nails remains crucial.
Peeling off a sticker or stick-on false nail can take a thin layer of the nail surface with it. To minimise damage, lift it gently from one edge after soaking your fingers in warm water or using the removal product stated on the packaging. Don’t apply stickers to a damaged or inflamed nail, or to skin that’s showing a reaction.
A 20-piece kit is handy for a full manicure, but make sure it offers several dimensions. Thumbs, index fingers and little fingers aren’t the same width. Assorted sizes also let you keep a few pieces for a touch-up or a new nail art combination.
Look for a clear description of the material and adhesive. Some listings mention a gel polymer and an adhesive described as gentle on natural nails. Others provide the full ingredient list on the packaging. If you have a known sensitivity to adhesives or resins, do a patch test on a small area of skin and read the manufacturer’s warnings carefully.
Claims like “no UV lamp needed” or “no drying time” refer to a specific application method – they don’t mean you can skip the instructions. Also follow the recommended wear time and storage conditions.
A careful application needs few tools, but some can really make things easier:
The surface must be clean, dry and completely grease-free. Place the sticker near the base of the nail without touching the skin, then smooth it from the centre outwards to push out any air bubbles. Press firmly for 10 to 30 seconds, depending on the product instructions, then file the excess towards the tip of the nail.
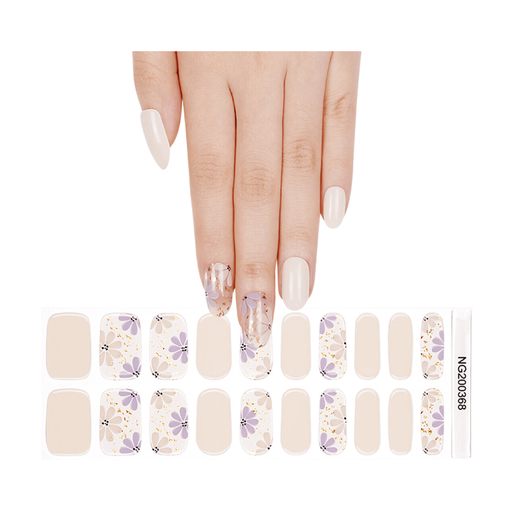
Why this choice suits this profile: Its white-tip design is ideal for anyone after a subtle stick-on French manicure, without needing professional tools.
The 20 pieces make it easy to pick the right width. The listing describes a press-on application, finished with a file or scissors.
20 stickers per set, white-tip design, adhesive described as suitable for natural nails and application with no waiting time claimed.
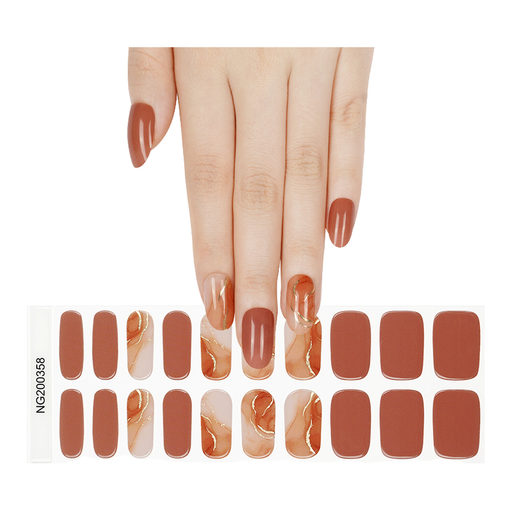
Why this choice suits this profile: This option is for those who value a glossy finish and enjoy switching up their look quickly at home.
The listing recommends applying to clean, grease-free nails and removing gradually starting from the edge. It also advises avoiding water for the first hour.
20 pieces, claimed glossy finish, no UV lamp needed and detailed composition on the product page.
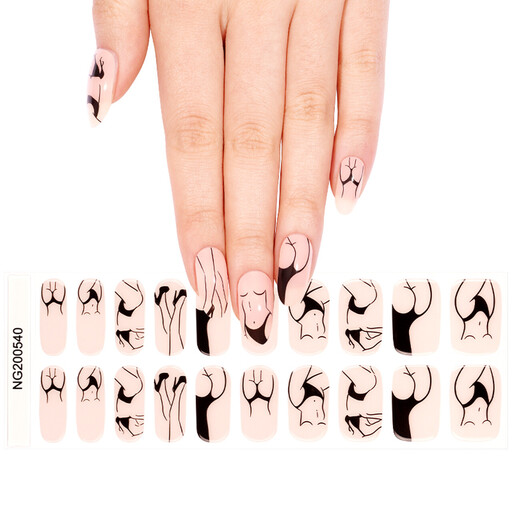
Why this choice suits this profile: Its mix of colours and patterns is ideal for those who change their style often or want easy nail art that suits different occasions.
The range of sizes helps minimise overhang. The listing recommends cleaning, aligning, smoothing, then filing the excess towards the nail tip.
20 stickers, gel texture described as flexible and a wide choice of patterns. A patch test is recommended for sensitive skin.
We’ve put together a full, regularly updated list of products that meet these strict selection criteria and European safety regulations.
An electric nail file can be a useful addition to a maintenance kit, but it’s not essential for applying these stickers. For a first attempt, a manual file usually gives you more control over the finish.
Not always. Several of the options shown here claim to need no UV lamp and no drying time. However, do check the instructions for the model you choose, as the method can vary depending on the material and adhesive.
How long it lasts depends on the preparation, how well it fits and your exposure to water or heat. Some listings claim up to 14 days under the right conditions. To protect your natural nails, stick to the wear time stated on the packaging and take breaks between applications.
Yes, the options we’ve selected are described as compatible with natural nails. However, avoid applying to a damaged nail or irritated skin. If you notice redness, itching or discomfort, remove the product immediately and rinse the area.