
Livraison le jour même ou le lendemain

Qualité garantie

Débloquez vos offres de bienvenue: Livraison GRATUITE | Jusqu'à -80 % | 30 jours d'essai gratuits à JoyPlus
Téléchargez l'application
Self-adhesive gel nail stickers are winning fans thanks to their quick application, glossy finish and no drying time. They let you switch up your style without pulling out several bottles of polish or investing in a UV lamp. However, not all products are created equal. A poorly chosen size, unsuitable adhesive or rushed preparation can quickly turn a home manicure into a disappointing purchase.
Here are the criteria to check before choosing your press-on false nails, along with a selection of MeoMagic designs available on Joybuy.
The term gel nail stickers can refer to simple flexible strips that are ready to apply. Some products, however, require a UV or LED lamp finish. If you’re after a manicure without a UV lamp, check the instructions carefully. Self-adhesive models are generally applied, pressed and filed without any drying. For certain versions, the lamp is only offered as an optional extra to boost staying power.
A photo doesn’t always let you judge the dimensions, flexibility or number of sizes supplied. A very attractive design might turn out to be a poor fit for short, wide or highly curved nails. To minimise lifting, choose an assortment with several sizes. The strip should be slightly narrower than your nail and not touch the skin.
A nail sticker should never be ripped off. Forced removal can weaken the surface of your natural nail. Adhesives and resins can also cause a reaction in sensitive individuals. Before a full application, it’s best to test the product on a small area of skin, following the precautions stated on the packaging.
A pack of 20 nail stickers usually offers several dimensions to cover all ten fingers and keep a few spares. This variety is especially useful when your nails aren’t all the same width. Also check whether the strips can be filed at the free edge to adjust their length without needing scissors.
Product listings may mention a gel polymer, flexible adhesive or glossy top layer. For the exact composition, refer to the packaging, particularly if you’re sensitive to adhesives. The models shown here are decorative accessories for external use only. They must not be applied to damaged or infected nails, nor to irritated skin.
Consistent wear often depends more on preparation than on any advertising promise. For a successful DIY manicure:
Avoid water and heat immediately after application. Depending on the model, the recommended wear time can be up to fourteen days. However, this varies according to preparation, daily activities and your nail type.
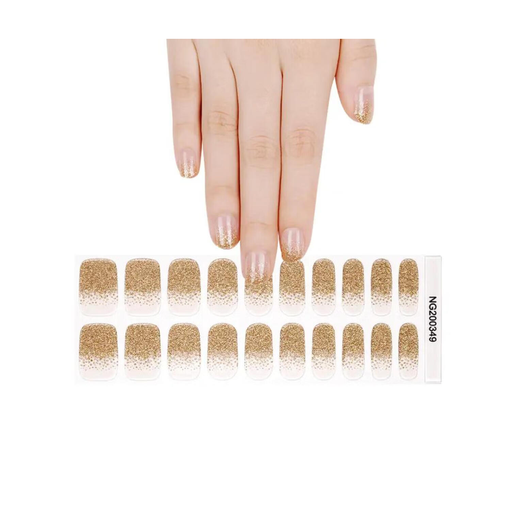
Why this choice suits this profile: With 20 pieces, this format is ideal for those discovering easy nail art and wanting to try a manicure without a UV lamp, liquid polish or drying time.
The assorted sizes reduce the risk of choosing a strip that’s too wide. The listing also mentions gradual removal with warm water or a gentle remover.
20 strips, no-dry application and varied designs. The full composition is stated on the packaging.
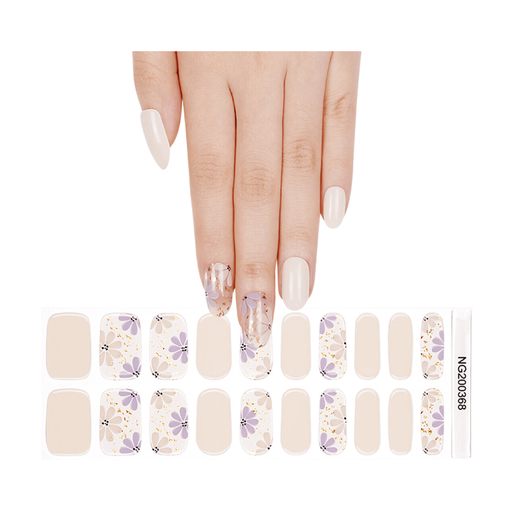
Why this choice suits this profile: With its white tip, this design is aimed at those looking for a trendy yet subtle nail decoration, suitable for both the office and a dressed-up occasion.
The French manicure pattern is already defined, avoiding the uneven lines you sometimes get with regular polish.
20 pieces, an adhesive described as gentle and a white-tip finish. After application, pressing for 10 to 15 seconds is recommended.
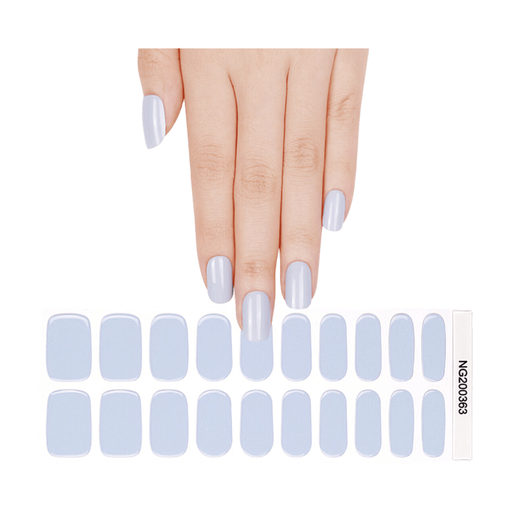
Why this choice suits this profile: Its silver glitter design is perfect for parties, evenings out and regular style changes. It lets you achieve eye-catching nail art without having to paint every detail by hand.
The colour and pattern are clearly identified, making it easier to choose compared to a less descriptive photo. Application requires no drying or UV lamp.
20 pieces, a silver glitter finish and gradual removal with a suitable tool or gentle remover.
We’ve put together a comprehensive, real-time updated list of products that fully meet these strict selection criteria and European safety regulations.
To get long-lasting nail stickers, apply them to perfectly dry, grease-free nails. Avoid putting them on straight after a shower or bath. You can add a layer of clear polish if the manufacturer allows it, especially on the free edge. For household chores that involve prolonged immersion in water, remember to wear gloves.
Also respect the wear time stated on the packaging. Some listings recommend not exceeding fourteen consecutive days and letting your nails rest after removal. If redness, itching or swelling occurs, remove the product immediately and stop using it.
Yes, many models are designed to be applied, pressed and then filed without a lamp or drying time. However, check the instructions for your chosen product: some manufacturers indicate that optional UV or LED curing can boost staying power.
The duration depends on preparation, the adhesive, your nail shape and exposure to water and heat. Product listings may claim a wear time of up to fourteen days under good conditions. This duration is not guaranteed for every individual.
Gently lift one edge after softening the adhesive with warm water or a suitable product. Remove it slowly, without scraping or pulling sharply. If the strip resists, repeat the soaking rather than applying strong force.