
Livraison le jour même ou le lendemain

Qualité garantie

Débloquez vos offres de bienvenue: Livraison GRATUITE | Jusqu'à -80 % | 30 jours d'essai gratuits à JoyPlus
Téléchargez l'application
Flawless nails without spending hours at the salon or enduring the endless drying time of polish? That's the promise of gel nail stickers. This at-home manicure solution is winning people over with its speed and vast array of styles. The problem? The market is flooded with products of wildly inconsistent quality. It's easy to fall for the common pitfalls, leading to disappointment and wasted money.
As a Product Expert at Joybuy, my mission is to help you cut through the noise. Let's skip the marketing jargon and get straight to the facts. Here are the most frequent issues and, more importantly, how to avoid them to choose strips that truly deliver on their promises.
For easy nail art that lasts, the design isn't everything. Far from it. Here are the three key points to check before you add to cart.
There are two main types of stickers on the market, and the difference between them is crucial for longevity and the final look:
The choice depends on your needs: immediate simplicity or enhanced durability.
The quality of the adhesive is non-negotiable. A low-grade adhesive can cause skin reactions and, more importantly, weaken the nail plate (the keratin) during removal. Opt for products that specify a non-toxic, medical-grade adhesive. A good sticker should be removable by gently peeling it off with the help of a little cuticle oil, leaving no residue or requiring any scraping.
A quality kit is about more than just pretty designs. Practicality is paramount. A good rule of thumb? A pack containing at least 20 stickers in 10 to 12 different sizes. This ensures you can find the perfect fit for every nail, from thumb to pinky. A precise fit is essential to prevent lifting at the edges and achieve a flawless result.
To guide you, here is our selection, designed for different needs and budgets, taking into account the criteria we've just discussed.
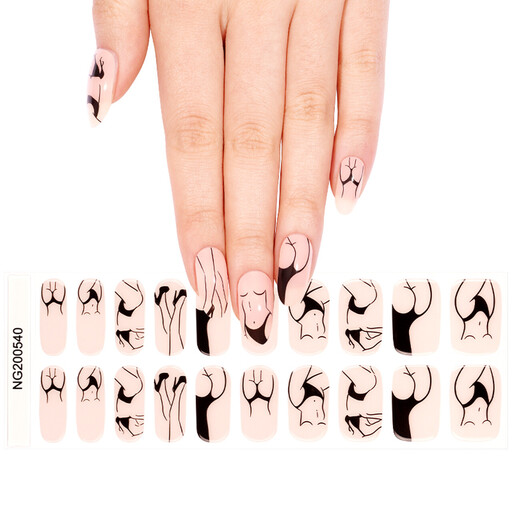
Ideal for getting started. This kit doesn't require a UV lamp, making application as simple as possible. It's the perfect budget-friendly and practical option for trying out nail polish strips without investing in extra equipment.
With 20 stickers in various sizes, it avoids the one-size-fits-all trap, ensuring you'll find the right fit for every nail.
Instant application with no drying time or lamp needed. The kit includes everything necessary for a quick manicure.
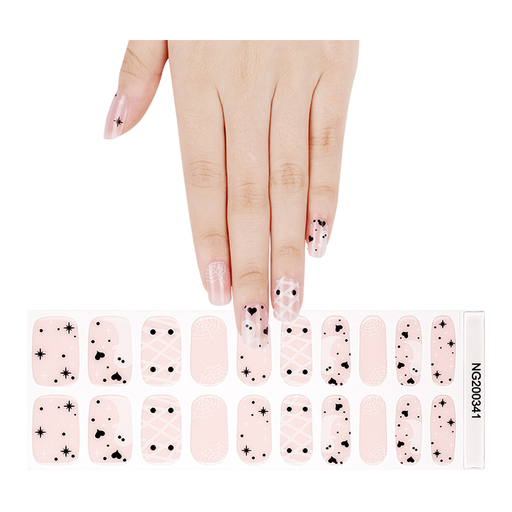
For those who want a salon-quality finish and superior longevity. This semi-cured model cures under a UV lamp for enhanced durability and shine. Perfect for sporting the latest trends with a professional look.
Thanks to the gel curing process, its resistance to chips and dings is far superior. Say goodbye to the short-lived wear of classic stickers.
Plump, ultra-glossy gel finish. Extended wear time thanks to curing under the lamp, while still being easy to remove.
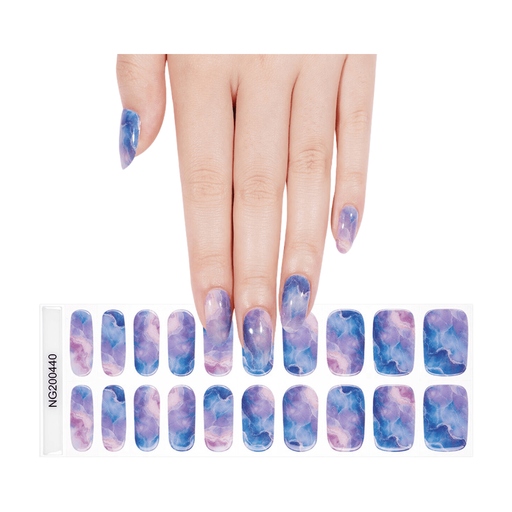
Perfect for those who love to switch up their manicure often. This kit focuses on a gentle removal process that preserves the nail surface, a crucial point for frequent use.
It directly tackles the myth of difficult removal. Its formula is designed for a clean peel-off, with no risk to the natural nail.
Ideal for maintaining nail health, even when changing styles weekly. The 20-piece format offers excellent value for money.
We have curated a full range of products that meet our selection criteria and current safety standards.
Wear time heavily depends on the sticker type and the quality of the application. A classic adhesive nail polish strip will last an average of 3 to 7 days. Semi-cured gel stickers, once cured under a UV lamp, can last from 10 to 14 days (or even longer) if the nail has been properly prepped (clean, dry, and oil-free surface).
Yes, it's essential for "semi-cured" models. The UV/LED lamp is used to fully harden the gel, giving it its final strength and shine. Without this step, the sticker will remain soft and won't last. For classic adhesive stickers, no lamp is required. Always remember to check the product description.
Gentleness is key! Carefully lift a corner of the sticker with a small wooden stick (often included). Apply a few drops of cuticle oil or gentle nail polish remover under the sticker to help dissolve the adhesive. Continue to peel it off gradually until it's completely removed. Most importantly, never rip it off in one go. Remember to moisturize your nails and cuticles afterwards.