
Livraison le jour même ou le lendemain

Qualité garantie

Débloquez vos offres de bienvenue: Livraison GRATUITE | Jusqu'à -80 % | 30 jours d'essai gratuits à JoyPlus
Téléchargez l'application
Getting a salon-quality manicure or pedicure from the comfort of your home has become an accessible luxury. The essential tool to achieve this? The electric nail drill. However, the market is flooded with models making tempting promises that often lead to disappointment. Before you invest, it's crucial to know how to navigate the marketing traps that can turn a promising purchase into a throwaway gadget.
The two most common mistakes? Being swayed by a myriad of poor-quality accessories, or choosing a device with a motor that overheats and stalls under the slightest pressure. A good device isn't judged by the number of its accessories, but by the quality and durability of its components.
To make the right choice, you need to look beyond the packaging and focus on the technical specifications that truly make a difference. Here are three points you should never overlook.
Speed, expressed in revolutions per minute (RPM), is often the number one selling point. However, a high rotation speed is useless without sufficient motor torque: the device will stall on first contact with the nail.
The choice between a corded model and a cordless nail drill will depend on your usage.
A complete manicure-pedicure kit means little if the attachments are poor quality. They will wear out prematurely and could even damage your nails. Opt for bits made from durable materials like sapphire, diamond, or ceramic. A good basic kit should include at a minimum:
To help you see more clearly, we have selected products that meet specific needs, based on their technical features and suitability for each user profile.
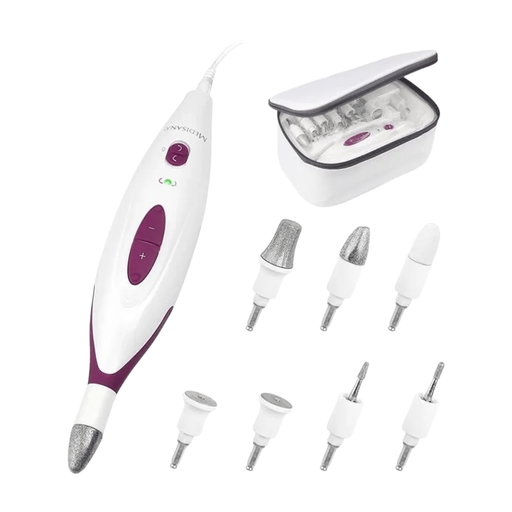
Why this model? Ideal for getting started with at-home nail care. Simple and safe, it provides a complete set to get started without any hassle and perform essential treatments (filing, buffing, cuticles).
This kit includes 7 quality attachments for various uses, so you won't need to buy more accessories right away. Its two-speed motor (3,800/4,600 RPM) is perfectly calibrated for home use, reducing the risk of injury or overheating.
A complete 9-piece set with a practical storage case. The two speeds allow for precise control during different stages of care, with total simplicity.
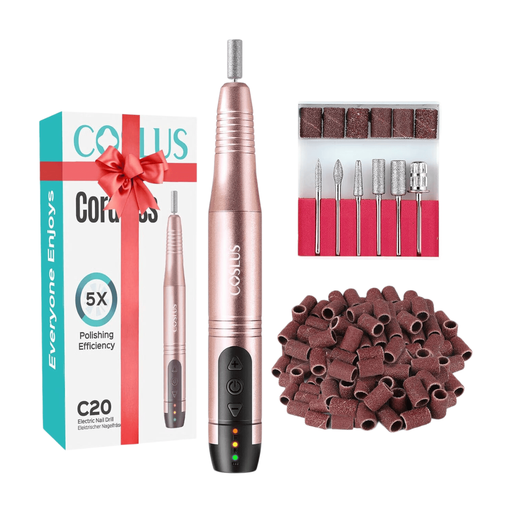
Why this model? For those who work with gel or resin and need both power and mobility. Its high-performance motor and cordless design allow you to do precision work anywhere, anytime.
Its powerful motor (up to 20,000 RPM) doesn't falter, even under pressure. This is a critical feature for shaping gel, which helps avoid the stalling issue typical of low-end models. Here, cordless doesn't mean sacrificing power.
Its cordless design offers over 3 hours of battery life. The speed is adjustable, and the bi-directional rotation suits both right- and left-handed users. All this with low noise and heat levels.
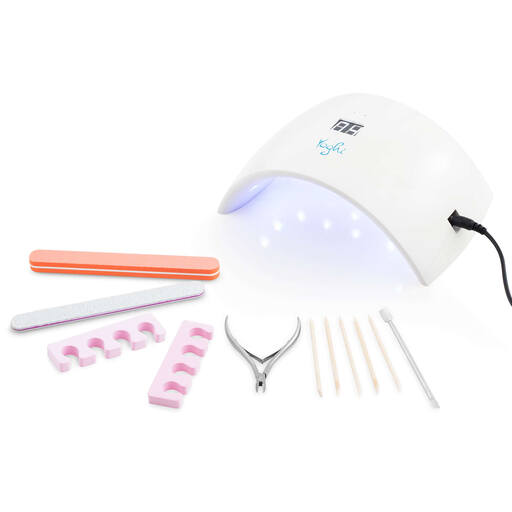
Why this model? It's the ideal all-in-one solution for fans of gel manicures. This gel polish kit includes not only the prep tools but also the essential component: the curing lamp.
It eliminates the risk of incompatibility and the chore of buying a separate lamp. Everything is included for a seamless process, from nail prep to polish curing, ensuring a flawless and consistent result.
It includes a 12W LED lamp (15 LEDs) compatible with both UV and LED gel polishes. The 99-second automatic timer simplifies curing, and the stainless steel accessories are a mark of durability and hygiene.
We have compiled a complete and up-to-date selection of products that meet our strict selection criteria and current safety standards.
For natural nails, a low to medium speed (between 2,000 and 5,000 RPM) is recommended to avoid weakening them. To remove gel or acrylic, a higher speed (15,000 RPM and above) will be much more effective. The golden rule: always start at the lowest speed and gradually increase according to your comfort and the task at hand.
Yes, absolutely. You just need to use the right attachments (usually felt or a very fine grit for buffing) and set the device to a low speed. An electric nail file is much faster and provides a more even result than a manual file, but it requires a light, controlled touch to avoid weakening the nail.
After each use, cleaning the attachments is essential for both hygiene and their longevity. Use a small brush to remove any nail dust residue. For a complete disinfection, you can soak them for a few minutes in a 70% alcohol solution or a suitable disinfectant. Then, let them air-dry completely before storing them.