
Livraison le jour même ou le lendemain

Qualité garantie

Débloquez vos offres de bienvenue: Livraison GRATUITE | Jusqu'à -80 % | 30 jours d'essai gratuits à JoyPlus
Téléchargez l'application
Scrapbooking and card making are transformative creative hobbies, capable of turning a simple sheet of paper into a cherished keepsake. The secret tool for many enthusiasts? Scrapbooking cutting dies, often known simply as dies. These metal shapes allow you to cut perfect designs, time and time again. But be warned: the market is flooded with options, and it's easy to be tempted by products that lead to frustration and wasted money.
Before expanding your collection, learn to spot the dies that won't live up to their promises. Here are the most common pitfalls to avoid:
Knowing how to spot these flaws will help you build a collection of reliable, durable tools, ensuring your DIY creative hobbies remain a pleasure.
To avoid unpleasant surprises, focus on a few objective technical points. These are the true guarantors of a quality paper cutting tool.
Most cutting dies are designed to work with the most popular manual die-cutting machines (Sizzix, Toga, etc.). The principle is almost always the same: you create a "sandwich" with cutting plates, the die, and your paper. But this universal compatibility hinges on one thing: a standard die thickness. Always check that the product is advertised as compatible with major brands. When in doubt, a standard-thickness carbon steel die is a safe bet.
A die's lifespan depends entirely on its metal composition. Carbon steel stands out as the benchmark for several reasons:
A die not made of carbon steel will wear out prematurely, quickly turning a good deal into a bad investment.
For your creative card making or photo album decoration, it's crucial to distinguish between the different types of dies:
Choosing the right type of scrapbooking stencil or die is therefore essential to achieve your desired effect.
To help you make an informed choice, we've identified a few products that meet specific needs, based on our criteria for quality and versatility.
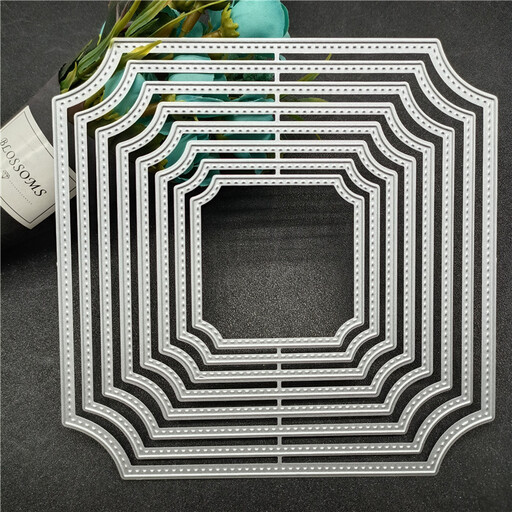
Why we chose it: A perfect starter kit. It offers a great variety of frames in different sizes, perfect for creating backgrounds, labels, or highlighting photos. Its versatility is a real bonus for learning to layer without having to buy multiple sets.
Its carbon steel construction ensures good longevity and prevents warping. No more low-quality dies that wear out quickly and ruin your paper.
Excellent versatility for the price. With 8 shapes, the creative possibilities are multiplied from your very first project.
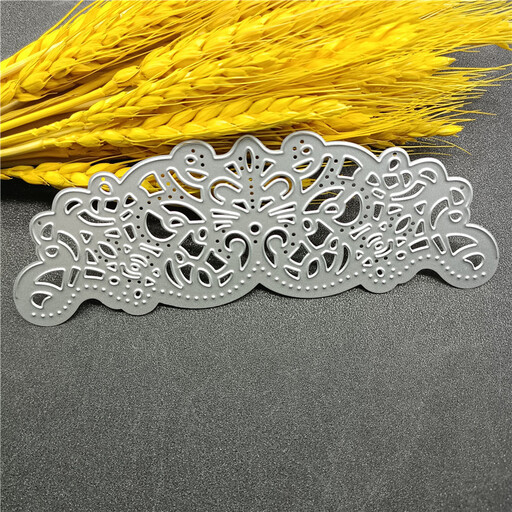
Why we chose it: Perfect for card makers who want to add a touch of sophistication. This die creates a delicate border, ideal for elevating invitations, greeting cards, or announcements. Its intricate design brings a professional finish to your creations.
The precision-etched carbon steel guarantees a flawless cut of the lace details. This avoids the trap of patterns that come out coarse and lacking finesse.
Allows you to create complex decorative borders in an instant, which immediately enhances the look of your creations.
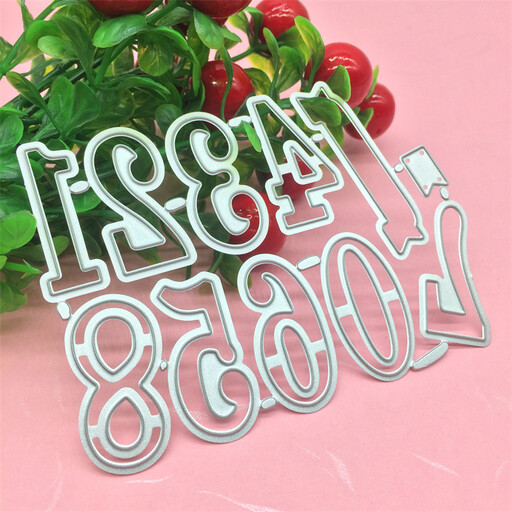
Why we chose it: A complete set of letters and numbers is an essential staple for personalising your creations. It allows you to compose custom titles, names, dates, or messages for your photo albums, journals, or birthday cards.
Their standard format ensures compatibility with most machines. You won't risk ending up with an unusable alphabet.
Limitless customisation. A single set is enough for hundreds of different projects (names, dates, titles, and more).
We've curated a complete selection of products that meet our quality criteria.
Most cutting dies are used with a manual die-cutting machine. The principle is simple: the machine applies high pressure to a "sandwich" made of acrylic plates, the metal die, your paper, and sometimes an adapter pad. The good news: you generally don't need to buy a machine from the same brand as your dies, as most manufacturers adhere to standard thicknesses.
Maintenance is simple but essential. After each use, remove any small pieces of paper stuck in the die with a stiff-bristled brush or a pointed tool (a simple pick will do). For maximum lifespan, store your dies flat, ideally on magnetic sheets. This keeps them organised and protects them from impact and warping.
Yes, it's entirely possible with most thin dies. To turn a cutting die into an embossing tool, simply replace one of your rigid cutting plates with a soft embossing mat (often made of silicone or rubber). This mat absorbs some of the pressure, causing the die to impress a raised pattern onto the paper instead of cutting through it. The result won't replace a true embossing folder for deeply defined patterns, but it's an excellent trick for adding subtle texture.