
Livraison le jour même ou le lendemain

Qualité garantie

Débloquez vos offres de bienvenue: Livraison GRATUITE | Jusqu'à -80 % | 30 jours d'essai gratuits à JoyPlus
Téléchargez l'application
Collecting, refrigerating, freezing and then transporting breast milk takes a bit of organisation. Yet the choice of containers is still too often based on capacity or price, without considering the details that make a real difference day to day: compatibility with your breast pump, the quality of the seal, the material, resistance to cold, and how easy it is to clean.
For breastfeeding women, new mums, parents who express milk and those who support them, here are the criteria to check before buying breast milk storage bottles.
A bottle designed for feeding your baby isn’t necessarily suitable for freezing or long-term storage. Some models come with a teat and an anti-colic system, but they’re not very practical for collecting milk directly or stacking several portions in the fridge.
A storage container should first and foremost have a reliable lid, clearly legible markings and a shape that’s easy to store. The teat can be added separately at feeding time.
The BPA-free claim is reassuring, but it’s not enough on its own. Also check for the possible presence of BPS, the type of plastic used, the stated cold resistance and the cleaning instructions. Even when a material is intended for food contact, you still need to follow the manufacturer’s recommendations.
The Medela models shown here are stated to be BPA-free and BPS-free. For other references, always check the product page and labelling before first use.
A container of the right size can become useless if its lid comes loose at the bottom of your bag. For travel, check the type of thread, whether there’s a seal, and compatibility with a cool bag or cooling system.
A cool box or cooling accessory doesn’t replace the rules for storing breast milk. Follow the advice of your midwife, doctor or health authorities, as well as the instructions on the packaging.
Bottles that are compatible with a breast pump save you from having to transfer milk after each session. This reduces handling and makes portion preparation simpler.
Check the type of screw thread and the brand of your pump carefully. A thread described as universal may in fact only be universal within a particular range. Medela bottles, for example, state compatibility with Medela breast pumps and Calma feeding solutions.
The right size depends on the volume you usually collect and the space available in your fridge or freezer.
Well-contrasted markings make it easier to keep track of quantities. When freezing, leave enough space to allow for the liquid expanding.
Choose containers that are easy to take apart, have few parts and have surfaces that are easy to reach. If the manufacturer allows dishwasher use, check which basket the bottle should go in. For the Medela 150 ml bottles, the product page recommends washing in the top basket.
Before each use, inspect the bottle, lid and seal. Plastic can become more fragile after repeated freeze-thaw cycles. Replace any part that is cracked, warped or discoloured, as well as anything that no longer seals properly. Also avoid pouring boiling water into a container that isn’t designed for it.
The references below meet different needs. They don’t replace checking compatibility with your existing equipment.
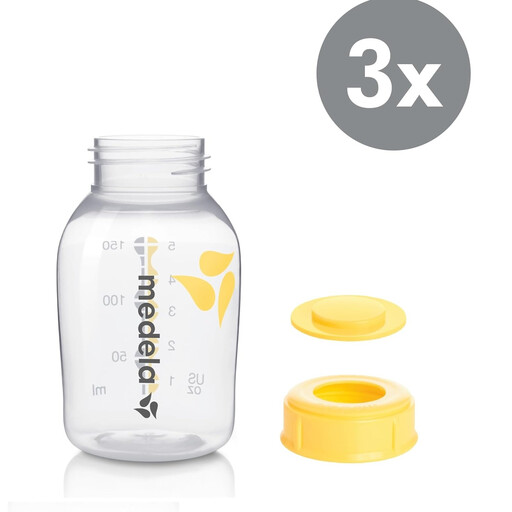
Why this choice works: This pack of three 150 ml containers makes it easy to rotate between collecting, refrigerating and cleaning, especially for daily use at home.
The markings up to 150 ml help you prepare precise portions, while the screw-on lids mean you don’t have to rely on a teat for storage.
Food-grade polypropylene stated to be BPA-free and BPS-free, compatibility with Medela breast pumps, reusable and stated to be freezer-safe.
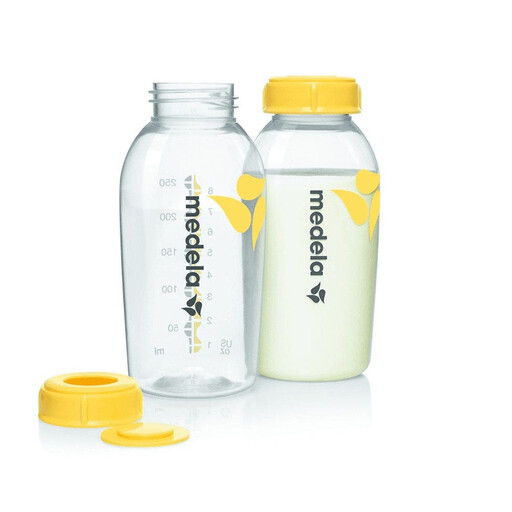
Why this choice works: With their 250 ml capacity, these bottles give you more room for larger pumping sessions or for preparing portions to give to a family member.
This size reduces the need for several small containers, while still having a screw cap designed for storage and transport.
Pack of two, food-grade material stated to be BPA-free and BPS-free, universal thread stated for Medela products, suitable for both fridge and freezer.
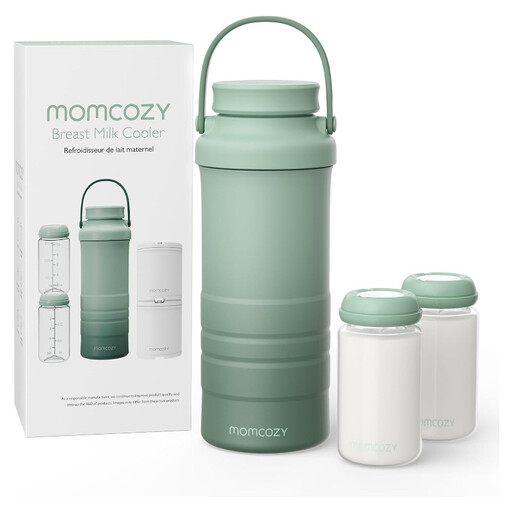
Why this choice works: This set combines two bottles with a refrigerated transport solution, which may appeal to parents who regularly travel with expressed milk.
The cooling relies on a separate tube that needs to be frozen in advance. So you’ll need to plan ahead and make sure the bottles are properly sealed before travelling.
Two 22 oz bottles, food-grade plastic stated to be BPA-free, pre-freeze cooling tube and inner bottles compatible with the Momcozy bottle washer.
Before first use, wash the breast milk storage bottles and their lids following the brand’s instructions. Label each portion with the date and, if needed, the time of expression. Place the milk quickly in the coldest part of the fridge or in the freezer, avoiding the door.
For storing breast milk in the fridge or freezer, remember one simple rule: follow a reliable health source and the manufacturer’s instructions. In particular, avoid mixing warm milk with an already cooled portion. Thaw gradually and do not reuse a container that has a crack, a leak or a persistent smell after washing.
We’ve put together an updated selection of containers and smaller sizes to compare by capacity, transport and everyday use.
Yes, but only if the manufacturer’s product page states that the container is freezer-safe. Don’t fill the bottle to the brim: leave space for the liquid to expand, and handle the plastic carefully after thawing.
A 150 ml size is often good for preparing compact portions and reducing waste. A 250 ml model will be more practical if the volume you collect each session is larger. The key is to match the capacity to your routine, rather than always choosing the largest size.
The storage time depends on the temperature, the storage method and current health recommendations. Check the official guidelines as well as the product labelling. Dating each bottle is essential for using portions in the right order.