
Livraison le jour même ou le lendemain

Qualité garantie

Débloquez vos offres de bienvenue: Livraison GRATUITE | Jusqu'à -80 % | 30 jours d'essai gratuits à JoyPlus
Téléchargez l'application
For dedicated crafters, every project is a new story to tell. From greeting cards and announcements to photo albums, it’s the details that make all the difference. And for that, a scrapbooking cutting die (often simply called a die) is the indispensable tool that transforms a simple sheet of paper into a delicate and personal creation.
But with the vast array of shapes, sizes, and designs available, navigating the options can be tricky. This guide is here to help: we’ve selected versatile models and gathered essential tips to help you choose the right tools for your creative ambitions.
Before you make a purchase, a few simple criteria will help you make the right choice and ensure your new tools are a perfect fit for your craft room.
This is the absolute essential, the non-negotiable starting point. Not all cutting dies are universal. Be sure to check the specifications of your die-cutting machine (Sizzix Big Shot, Cricut, etc.): what is the maximum cutting width? What types of dies does it accept? Most manufacturers list compatible machines on the packaging—a valuable piece of information to avoid any disappointment!
A highly detailed cutting die, such as one with fine lace or intricate calligraphy, promises a spectacular result, but it will be more demanding when it comes to paper quality. The paper shouldn't be too thin, or it might tear, nor too thick, to ensure a perfectly clean cut. For beginners or for quick projects, simple shapes are much easier to work with. More complex metal cutting stencils are ideal for creating centrepieces, but they will require a bit more patience when releasing the cut.
Think about your favourite types of projects. Are you a fan of card making? A card making die with messages or standard-sized frames will be a real asset. For your scrapbook pages, a frame cutting die is perfect for elegantly showcasing your photos. Our advice: start by building a collection of essential shapes (circles, squares, tags) and then add a few more specific designs. That's the key to limitless creativity!
Here are a few gems that stand out for their versatility and creative potential, for both scrapbooking and paper embossing.
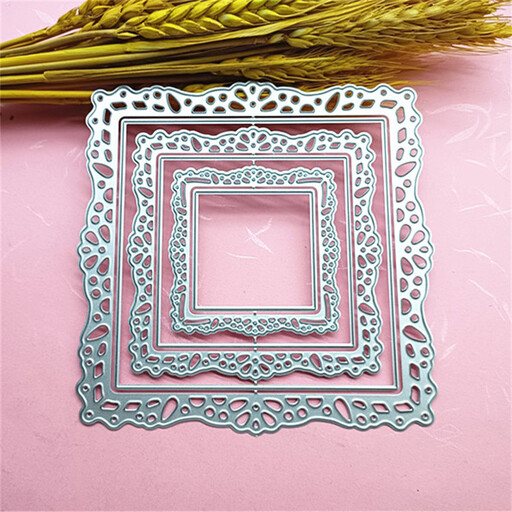
What sets it apart: This die creates a single square background piece, adorned with a highly detailed lace pattern. It's perfect for making a centrepiece that can serve as a card base or an embellishment on an album page.
Highlights:
Who is it for? For crafters who love romantic, vintage, or shabby chic styles and want to achieve a sophisticated card or page background in a single pass through the machine.
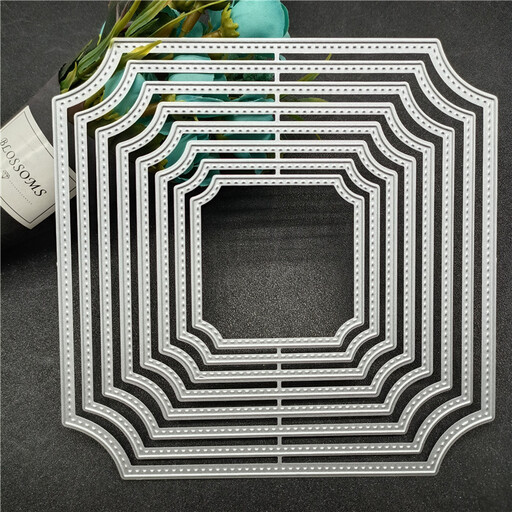
What sets it apart: This set includes 8 frames of various shapes and sizes, featuring irregular edges and floral motifs. It's a beautiful alternative to classic rectangular frames for a more organic and artistic look.
Highlights:
Who is it for? For scrapbookers who love to play with layering and are looking to bring a touch of originality to their compositions.
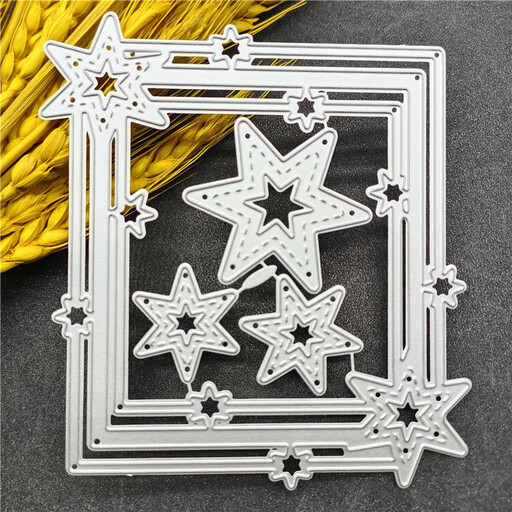
What sets it apart: This cutting die creates an openwork frame composed of a myriad of small stars. A simple and festive design, perfect for a host of occasions.
Highlights:
Who is it for? For anyone looking for a design that is both festive and versatile. Especially clever for projects with kids or for greeting cards.
The creative possibilities of scrapbooking dies are nearly endless. If our selection doesn't quite match your current project, or if you're simply curious to discover other shapes, textures, and themes, you'll find a vast range of options available.
Explore our complete collection of metal craft supplies to get inspired and find the perfect die to bring all your ideas to life.
A cutting die (or die) is a metal tool with sharp edges that, when pressed by a machine, cuts a precise shape from paper. In contrast, a stencil is a sheet (often plastic) with cut-out shapes that serves as a guide for applying ink, paint, or tracing a design. To put it simply: a die cuts, a stencil guides.
Absolutely! Many dies can also be used for paper embossing. Instead of cutting, the die will press into the paper to create a raised design. To do this, simply replace one of your cutting plates with a silicone embossing mat. The mat cushions the pressure and prevents the blade from cutting through the paper. The resulting textured effect is beautiful.
It's very simple. After each use, small paper pieces may get stuck in the finer details. Use a small, stiff-bristled brush or a pointed tool (a paper piercer) to gently remove them. For storage, it's best to keep them flat on magnetic sheets. This prevents them from bending and allows you to see your entire collection at a glance.