
Livraison le jour même ou le lendemain

Qualité garantie

Débloquez vos offres de bienvenue: Livraison GRATUITE | Jusqu'à -80 % | 30 jours d'essai gratuits à JoyPlus
Téléchargez l'application
Cutting dies are essential tools for your creative card making and paper DIY projects. However, the initial excitement can sometimes give way to disappointment: a design that tears the paper, a blade that dulls after just a handful of uses... With an overwhelming number of options available, choosing the right cutting die can quickly become a headache.
As a product expert for Joybuy, my mission is to do the groundwork for you. Let's skip the jargon and focus on what truly makes a difference in practice. Here’s how to avoid the two most common pitfalls and make the right choice.
To avoid these disappointments, you just need to check a few things before you buy. These details, which might seem minor, make all the difference in the quality and lifespan of your crafting tools.
A die's durability primarily depends on its material. Dies are made of metal, of course, but not all metals are created equal.
Without hesitation, opt for models made of carbon steel. Known for its strength, this material maintains a sharp cutting edge much longer than entry-level alloys. A carbon steel die guarantees clean, precise cuts, use after use. It's a non-negotiable feature if you're looking for reliable, long-term equipment.
A die, no matter how high-quality, is useless if it isn't compatible with your machine. Most dies for die-cutting machines are designed for the top models on the market (Sizzix Big Shot, Cricut Cuttlebug, etc.).
However, be aware that die thickness can vary. Before buying, check the specifications to ensure they match your machine's capabilities. Most crafters adjust the pressure by playing with the stack of plates (the famous "sandwich"), but a die that's too thick or too thin can quickly make the process tricky.
The intricacy of a design goes hand in hand with the type of paper you use.
flower dies, lace-style border dies): These models require a heavier paper weight (usually 160 gsm or more) to prevent tearing. The metal die must be able to slice through the fibres without pulling them.Keeping this balance in mind will save you a lot of frustration during your creative card making sessions.
To illustrate these criteria in action, here are a few gems suited for different types of crafters.
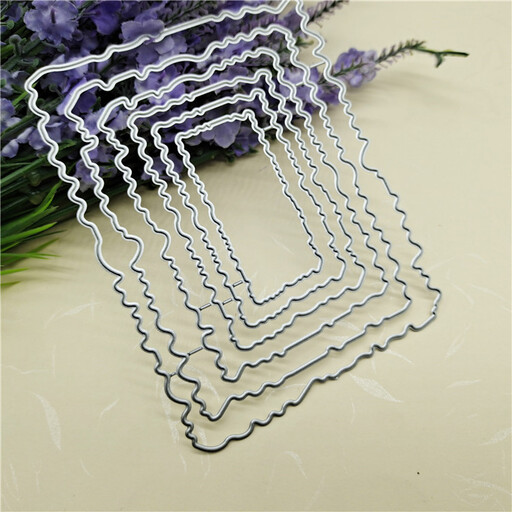
Why we chose it: Perfect for getting started, this set allows you to create frames of different sizes for your cards, photos, or labels. Its ease of use makes it a must-have for a first investment.
The simple geometric shapes minimise the risk of tearing, even on standard-weight paper. Its sturdy design ensures excellent durability.
Unbeatable versatility for card making, photo albums, and decor. An essential basic.
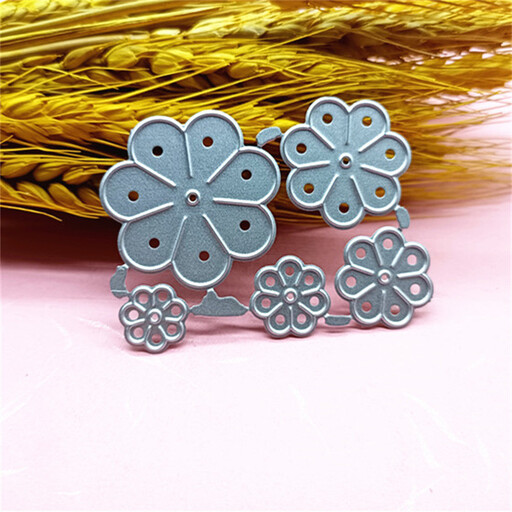
Why we chose it: Perfect for those who love to add depth and dimension. This set lets you cut petals and leaves to assemble into 3D flowers, bringing a touch of elegance to any creation.
Instead of one large, complex die, it relies on smaller elements that are easier to cut. This ensures flawless cuts that, once assembled, create a stunning result without the frustration of snagging designs.
Ideal for creating floral embellishments with a highly professional finish, perfect for wedding or birthday cards.
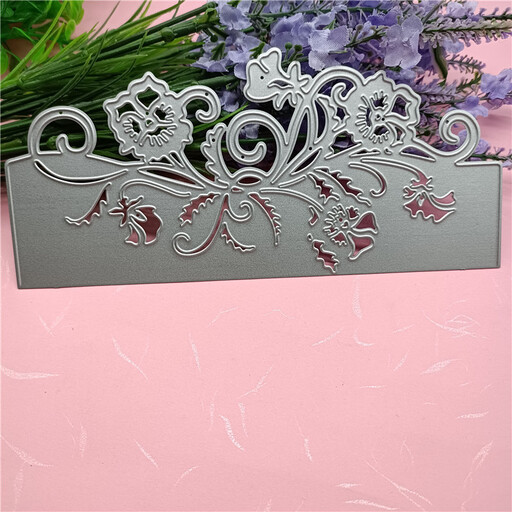
Why we chose it: For seasonal and event-based creations, having themed dies on hand is a real time-saver. This die offers ready-to-use designs like "Happy Birthday" or Christmas decorations.
Text and seasonal dies are designed to be, above all, legible and clean. Their design is optimised for a crisp cut, because an unreadable word or a damaged snowflake would ruin the entire effect.
Allows you to create themed cards and decorations in an instant with a professional and cohesive finish.
We've put together a complete selection of products that meet these demanding quality standards.
The vast majority of thin metal dies (or "wafer-thin dies") are universal. The product description usually lists compatible machines. As a general rule, if your machine accepts thin dies (like Thinlits, Framelits, etc.), it will work with most models on the market. The most important thing is to adjust the "sandwich" of plates according to your device's instructions.
Absolutely, and it's a very popular technique! To achieve paper embossing with a cutting die, simply replace your bottom cutting plate with a silicone embossing mat. The machine's pressure will then impress the design onto the paper in relief, without cutting it. A textured, elegant effect is guaranteed.
Proper maintenance significantly extends their lifespan. After each session, remove any small, stuck paper pieces with a brush or a fine-tipped tool. For stubborn residue, a simple piece of tape will do the trick. Finally, store your dies flat, ideally on magnetic sheets, to prevent them from bending or getting damaged.