
Livraison le jour même ou le lendemain

Qualité garantie

Débloquez vos offres de bienvenue: Livraison GRATUITE | Jusqu'à -80 % | 30 jours d'essai gratuits à JoyPlus
Téléchargez l'application
Acrylic paint markers promise the best of both worlds: the precision of a pen with the coverage of paint. Yet, countless artists and crafters have been frustrated by markers that fall short. Before investing in a new set, it's crucial to know how to decode the labels to avoid purchase regret.
The most common disappointments stem from three recurring issues:
To make the right choice, you need to focus on a few non-negotiable technical criteria.
The quality of an acrylic marker goes far beyond its colour palette. Three technical parameters are decisive in judging its performance and versatility.
The tip will dictate the primary use for your marker.
An acrylic marker's quality is judged by its ability to lay down a perfectly opaque and uniform layer of colour. A water-based, pigment-rich ink is often a sign of quality. It must provide good coverage on various surfaces, whether light or dark. A good multi-surface paint marker must perform on paper, but also on wood, ceramic, glass, or stone, without ever losing its intensity.
For complex projects like mystery colouring books or creating a complete acrylic drawing set, the ability to layer colours is fundamental. A quality ink dries quickly and becomes water-resistant, allowing you to apply new layers without reactivating or mixing the shades already laid down. This property is essential for creating depth and textured effects.
Rather than an endless list, we've selected products for specific user profiles. The goal: to help you find the tool that perfectly matches your creative ambitions.
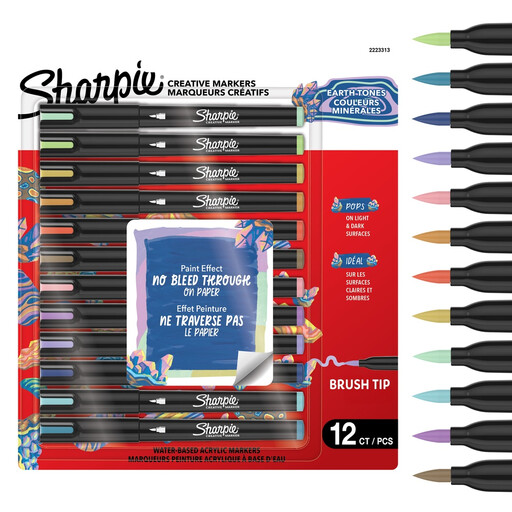
Why we chose it: Ideal for adult colouring and artistic projects that demand a wide variety of strokes. The brush tip on the Sharpie Creative Markers offers exceptional control for switching between fine lines and broad fills, while the palette of warm-toned markers brings a vibrant energy to any creation.
The water-based acrylic ink is formulated for an opaque, smudge-resistant finish that won't bleed through paper. This directly addresses the problems of transparency and bleeding.
Ready to use out of the box, no shaking required. The colours layer perfectly without mixing, ideal for creating depth effects.
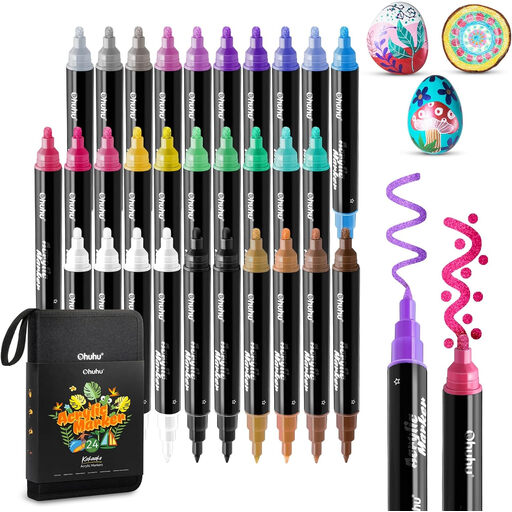
Why we chose it: The dual tip (fine and medium) offers maximum versatility for all-rounder creatives who switch from rock painting to customising ceramics. It's a true multi-surface paint marker.
The high-opacity ink ensures excellent coverage on numerous materials, solving the problem of disappointing opacity. The replaceable tips combat premature wear, a real bonus for longevity.
A set of 30 colours including metallic, white, and black shades. It comes with replacement tips for an extended lifespan.
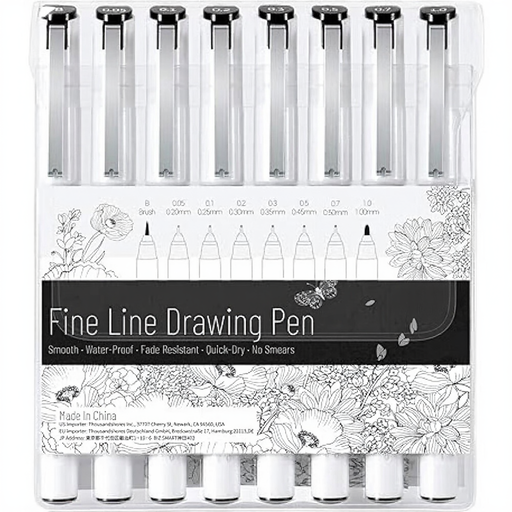
Why we chose it: While not acrylic markers, these fineliners are an essential companion for artists who need crisp, water-resistant outlines before the colouring phase. The different tip sizes are perfect for detail work and illustration.
The quick-drying, waterproof ink prevents smudging when colouring over it with acrylic markers, solving a real headache for many illustrators.
The set includes 7 different fine tip sizes plus a brush pen for maximum line versatility. The ink is water- and fade-resistant, ensuring the longevity of your artwork.
We've compiled a complete, up-to-date selection of products that meet our strictest quality criteria.
The golden rule: always store them horizontally. This position ensures a balanced ink flow to the tip and prevents air from getting in. And of course, make sure to always recap them tightly after each use.
No, and that's one of their major advantages. Water-based Sharpie Creative Markers are ready to use and require no priming or shaking. Simply storing them horizontally is enough to guarantee perfect ink flow from the very first use.
Yes, acrylic ink adheres well to most fabrics. For a permanent hold and better wash resistance, it's recommended to heat-set your design once the ink is completely dry. To do this, iron the fabric on the reverse side (or by protecting it with another cloth), using a hot iron with no steam. As always, a spot test on an inconspicuous area of the fabric is highly recommended.