
Livraison le jour même ou le lendemain

Qualité garantie

Débloquez vos offres de bienvenue: Livraison GRATUITE | Jusqu'à -80 % | 30 jours d'essai gratuits à JoyPlus
Téléchargez l'application
Want to modernise an interior without committing to endless renovations? The wood slat trend has emerged as the ideal solution for adding warmth and texture to a room. Adhesive wood slat wallpaper promises stunning results in record time. But be warned: the market is flooded with products of widely varying quality. To ensure you make the right choice and avoid unpleasant surprises, here is our guide to sidestepping the most common traps.
Falling for a product photo without checking the technical details is a fast track to disappointment. Here are the most frequent pitfalls.
For a result that meets your expectations, a few technical points are essential to check. They will make all the difference between a successful project and a purchase you'll bitterly regret.
The choice of material is crucial for the lifespan and maintenance of your wood slat wall covering.
For a convincing slatted wood effect wallpaper, the finesse of the print is everything. Look closely at the product visuals. The lines should be sharp, the colours nuanced, and the wood grain visible. A wider roll (around 60 cm) allows you to cover more surface area with fewer seams, simplifying installation and ensuring a more uniform finish. The essential rule of thumb: measure your wall and always allow for 10% extra paper for cuts and unexpected issues.
Even the best faux wood adhesive wall panel in the world won't stick to a poorly prepared surface. The wall must be smooth, clean, dry, and non-porous. Textured, grainy, or freshly painted walls (wait at least 3 weeks) are unsuitable. A simple cleaning with soapy water followed by complete drying is usually enough to prepare the surface and guarantee optimal adhesion.
Because every project is unique, here are some adhesive solutions we've selected for their relevance and quality.
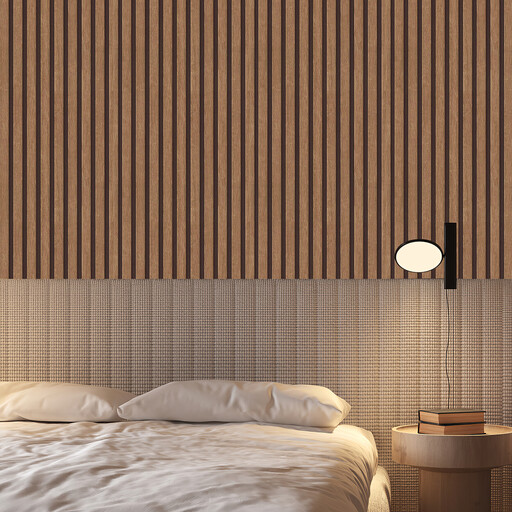
Why we love it: It's the perfect solution for creating a slatted accent wall without the hassle. Its red wood tone adds a touch that is both warm and very current, perfect for a living room, entryway, or as a headboard.
Its vinyl (PVC) construction ensures good durability and easy cleaning. Most importantly, the vertical pattern was designed for simplified edge-to-edge alignment. Say goodbye to the anxiety of mismatched seams!
It offers an "adhesive panelling" look without the constraints (and cost) of carpentry. Its washable surface is a real plus for high-traffic areas.
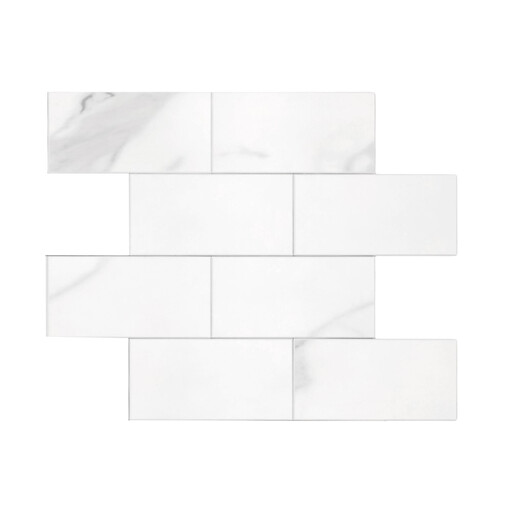
Why we love it: We're moving away from the wood effect to an ultra-functional solution for the kitchen or bathroom. This is the smart solution for renovating a backsplash or protecting a wall from splashes.
Its rigid structure eliminates the risk of bubbles and peeling, which are common with flexible wallpaper in humid environments. It was designed specifically for this use, which is its strength.
An ultra-simple, tool-free installation on any smooth, clean surface. Its clean, white finish fits in anywhere.
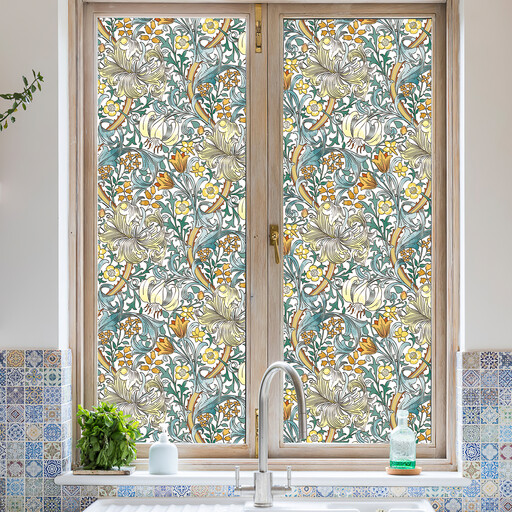
Why we love it: The concept of easy-to-apply coverings also extends to windows! This film is perfect for shielding from prying eyes (bathroom, glass door) without losing natural light.
It works by static cling, so there's no glue. Zero risk of sticky residue and the ability to reposition it infinitely during installation. It's the ultimate stress-free solution.
It creates a superb stained-glass effect while protecting your privacy. Fully removable and reusable, it's a renter's best friend.
Take a look at our complete selection of fastening and decoration solutions. Each product has been chosen by our editors for its quality and ease of use.
Its longevity depends on three factors: the quality of the product (a thick PVC will hold up better), the preparation of the surface (a clean, smooth wall is essential), and the environment (humidity, sun exposure...). Under optimal conditions, a quality model can remain flawless for several years.
No. For perfect adhesion, the wall must be completely smooth. Textured surfaces (stucco, textured fibreglass wallpaper...) will prevent the paper from sticking correctly. Also, avoid damp walls or those with peeling paint. As a precaution, always test on a small, inconspicuous area first.
The technique is simple: always work from top to bottom. Align the top of your strip, then peel back only about twenty centimetres of the protective film. Apply this section by smoothing it out from the centre to the edges with a soft squeegee (or a plastic card). Continue this way, removing the film as you go. A stubborn bubble? Gently peel back the area and reapply, smoothing it out well.