
Livraison le jour même ou le lendemain

Qualité garantie

Débloquez vos offres de bienvenue: Livraison GRATUITE | Jusqu'à -80 % | 30 jours d'essai gratuits à JoyPlus
Téléchargez l'application
A 120 mm ARGB PC fan can improve airflow inside a case while adding a personalised touch to your build. The problem is that product listings often mix lighting, speed and cooling performance without clearly stating the essential compatibility requirements. The result could be a fan that cannot be synchronised, a forest of cables or poorly directed airflow.
Before buying an RGB PC fan, check three things: the connector type, the intended use and the space available inside the case. This is especially useful for gamers, PC builders and owners of a white build.
The simple term ‘RGB’ is not enough to guarantee compatibility. An ARGB fan generally uses a 5V 3-pin connector, whereas standard RGB lighting often works with a 12V 4-pin connector. These two connections are not interchangeable. Incorrect wiring can damage the LEDs or even the motherboard.
Check the motherboard manual and look for labels such as 5V-D-G, ADD_HEADER or ARGB. The lighting connector is separate from the one that powers the motor.
A high rotational speed does not guarantee better cooling inside the case. Noise level, blade shape, static pressure and the resistance created by grilles also play a part. A fan with high static pressure will be better suited to a radiator or a restrictive front panel. Conversely, a model designed to operate in an unobstructed space will focus more on airflow.
The term ‘quiet’ also deserves a little scrutiny: noise varies according to the selected speed, the PWM curve, vibrations and the case design.
A conventional fan draws air in through the rear of its frame and expels it from the side with the supports. A reverse-blade model can create an intake while keeping the more attractive side visible. This is particularly useful for builds with side or bottom intakes, especially in a white PC case.
Before placing your order, decide whether you need intake or exhaust ventilation. A moulded arrow on the frame usually indicates the direction of airflow.
The 120 mm format generally corresponds to a fan measuring 120 × 120 × 25 mm. Check that your case supports this size and that the cables will not obstruct the graphics card or CPU cooler. Leaving around 5 cm of clearance in front of and behind the fan helps air circulate.
A case such as the Cooler Master Elite 302 Lite can accommodate up to six fans, with mounting points at the front, top and rear. However, the case’s technical specifications remain the best reference for your particular build.
A 4-pin PWM connector allows the motherboard to adjust the speed automatically according to the temperature. This is ideal for keeping operation quiet when idle, then increasing cooling during a gaming session.
Check how many connectors are available on your motherboard. Daisy-chaining can make installation easier, but you must still check the maximum power supported by each header.
A 3-pack of 120 mm fans can share the same PWM and ARGB signal when it has daisy-chain connectors. This makes cable management considerably easier. Proprietary systems such as iCUE LINK use their own hub and connections, however, so they do not connect in the same way as a standard 5V 3-pin ARGB fan.
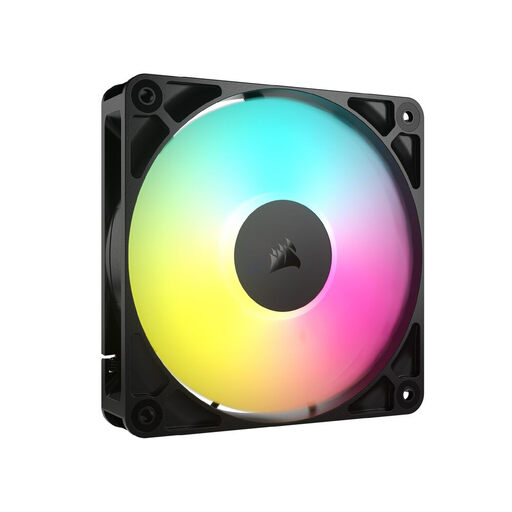
Why this choice suits this profile : With a single fan, you can replace a faulty model or gradually add to your case without investing in a complete kit straight away.
The product listing specifies 4-pin PWM control, 5V 3-pin ARGB lighting and daisy-chaining. You can therefore control the speed and lighting separately, provided that your motherboard is compatible.
120 mm format, blades optimised for static pressure, anti-vibration pads and a magnetic dome bearing.
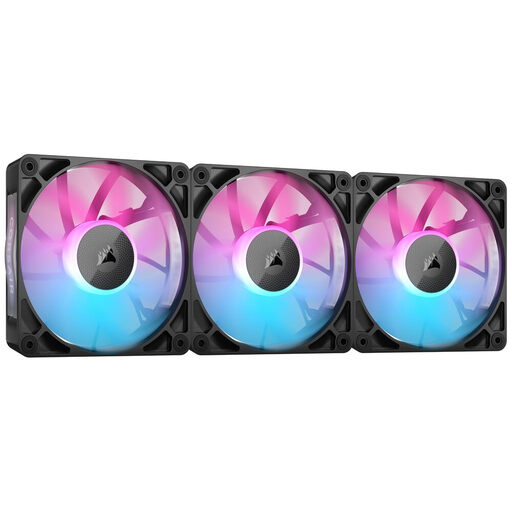
Why this choice suits this profile : This kit is designed for builds that require modular installation and centralised control of multiple fans.
The supplied iCUE LINK hub prevents a build-up of conventional connections. You will still need to provide SATA power and a USB connection to the motherboard.
Three fans, System Hub, modular connection and PWM control through the iCUE ecosystem.
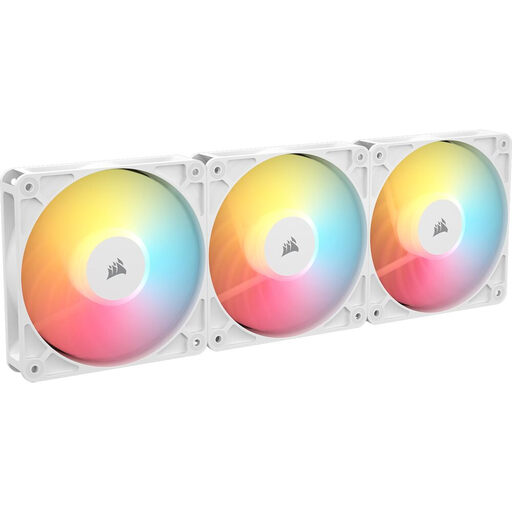
Why this choice suits this profile : Owners of a white case with side or bottom air intakes will appreciate its cohesive appearance, including on the visible side of the fans.
The reverse blades are designed for air intake, without showing the rear frame in certain orientations. The kit also retains daisy-chained PWM and ARGB connections.
Three white 120 mm fans, anti-vibration pads at all four corners, PWM control and 5V 3-pin ARGB lighting.
We have put together a complete, real-time updated selection of products that meet these demanding criteria while complying with European safety regulations.
Follow the general airflow pattern: cool air usually enters from the front or bottom before being expelled at the rear or top. Avoid pointing all the fans in the same direction. During installation, tighten the screws gradually in a diagonal pattern to minimise warping and vibrations.
Before carrying out any work, switch off the computer, turn off the power supply and unplug the mains cable. For cleaning, use compressed air and never pour liquid onto the motor or electrical components. Also make sure that cables are kept away from the rotating blades.
No. The motherboard must have a 5V 3-pin ARGB header. A 12V 4-pin RGB connector is not suitable. Also check for a 4-pin PWM connector if you want to regulate the speed automatically.
It depends on where it will be installed. Static pressure is particularly useful behind a dense grille, filter or radiator. In front of a wide-open area, airflow and the overall fan arrangement will have more influence.
Power consumption varies according to the motor, rotational speed and lighting. The models featured are powered by the motherboard or a hub, depending on their connection system. Check the power rating stated on the product listing and stay within the limit supported by each motherboard header.